
Before we jump right into How to use Notion, can I ask you a question?
Have you had the feeling that you been biting off more than you can chew?
It might be your hectic job, or your very personal side project, or just simply a silly hobby. There might be moments when you felt you need to get some help to get out of this mess.
There are many reasons people choose to use Notion. Some just want to organize their life. Some have very specific goals in mind. Whatever your reason is, using Notion can be very helpful in a lot of ways.
Notion for me has been a game-changer. It is the single most used piece of software for me.
It helped me organize my life, created a workflow for my blog, stores all my notes. Having used this mind-blowing product I thought why not share the word?
This is a blog post designed to help you understand what Notion is and how you can use Notion if you haven’t already.
Table of Content
What is Notion?
You might have heard about Notion somewhere but can’t pin out exactly where or you haven’t heard about it at all. Either way, listen up because I’m about to tell you what Notion is.
Let’s go for the textbook definition first.
The all-in-one workspace for your notes, tasks, wikis, and databases.
This is the official statement by Notion. This is very crisp, complete and the shortest answer you can come up with.
But let’s be honest and share the truth. You do not know what that line means.
Would you like a more simplified and detailed answer than that?
Fine.
Let me give you my best answer
Notion is a tool that helps you organize information.
Whoever you are, whatever you do with Notion, ultimately that is what you are doing with Notion
I can see how abstract my answer is, but that is the beauty of Notion. You have an infinite possibility of how to use it.
If you are a student, this might mean that you can save all your dear notes in Notion. For a professional, this might mean that you can use Notion to create a workflow for you and your team.
It is important to see the contrast here. How the usages are a world apart.
So in very simple terms, Notion is a tool that you can use if you want to amalgamate information from your information pile and organize it in a more intuitive and interactive form and share it.
If you haven’t still got your head around what it is, don’t worry, I have plenty more to tell you about Notion.
Why should you use notion?
I will be honest and admit that I have no idea why you should use Notion.
But that is not because Notion is useless, it is just that I do not know what is useful to you.
Instead of playing a guessing game, let me share with you why I use Notion?
Daily Journaling
When we think about daily journaling, the picture we paint is of a small diary where we write our deep secrets that we hide away secretly in a special drawer.
That sounds sweet but is utterly inconvenient.
For me, I wanted something that I don’t need a treasure map to find, something at my fingertip. Something that doesn’t need me to keep a count of the pages left, something that doesn’t make me look for pens.
You don’t need a superintelligence to tell that I need a digital tool for journaling.
Let me tell you I was very particular about the way my journal should be and had lots of ideas for it.
My journal should be the converging point of all my notes and tasks. The central hub of everything I do in Notion.
I can say with a tint of selfish pride, I got what I had in my mind. That is something you don’t get to say often in life.
For me, Notion was the perfect tool for journaling. My journal also serves as my habit tracker, idea repository, my task manager, and a lot more.
Did a thought of daily journaling just cross your mind?
If yes, then you might want to read my post about How journaling changed me
My book summaries
I had this obsession with being a voracious reader. I guess I just wanted to project myself as a source of paramount wisdom. It is strange because I didn’t enjoy reading but liked to be a person who reads.
Do you want to know what I hate about reading?
You can read thousands of pages but can only keep a few lines.
It always made me question the point of reading something if you can’t recall it later. It is depressing to realize that all that time and effort are in vain.
I wanted to find a solution to this. Let me share with you the best solution I could find.
The best thing to do is encapsulate everything you read into a tiny note so that you can refer to it anytime in the future.
This takes up additional time and effort but is an angel when you need it. You now don’t have to re-read everything and instead have a piece of compacted information that makes more sense to you than the original.
I started taking my book notes and summaries, and with little thought, I used Notion.
Note-taking
“Live as if you were to die tomorrow. Learn as if you were to live forever.”
Mahatma Gandhi
We are all forever students and taking notes is, therefore, a routine.
Before Notion, I used to rely on paperback notebooks. They were a disaster for me.
Wanna hear my problems with a physical book?
- There are finite books and infinite topics. Soon you will try the front side, backside, two ways from the middle. But there will be a point when you wish you could write without worrying about organizing your notes.
- Physical books run out of paper and are hard to manage once you have too many of them.
- You will always need a pen to write, which also is the master of the hide and seek game.
- No ‘Ctrl + C’, ‘Ctrl + V’
- Handwriting and portability.
I need to go digital here again.
There are many note-taking tools but I stick with Notion because it is more customizable and more flexible than any other note-taking tool I ever used.
Task Management
Writing your task is the most simple and effective method to improve productivity.
Notion is the task management tool that I use because I don’t know any other suitable tools and why should I use another tool when I have everything up and running in Notion.
These are the reasons I use Notion but you might have different needs and requirements. So let me give you some examples of all things you can use Notion for.
- Project management tool
- Blog
- Habit tracker
- Travel planner
- Financial planner
- Wiki page
- Thesis Planner
- Personal CRM
- Content calendar
- Meeting notes
There are just some of the example but they are not the only. Find out your reason for using Notion.
How to use Notion?
If you are still reading this blog post, it means that you might have got an idea of what Notion is and what you can do with Notion.
That leaves us with one fundamental question.
How to use Notion?
This section is for those of you who are interested in using Notion. This is a place where you can learn the basics of how to use Notion.
To fully understand the usage of something, you will need to have some theoretical and practical knowledge of it.
I will first give you some theoretical aspects of Notion and then we will try out an example for practical demonstration.
For a Theoretical person
Blocks
The basic building block of Notion is called a block itself.
In Notion, you have different blocks. Some basic and some advanced blocks.
Some examples of basic blocks are:
- Text
- Page
- Headings
- To-do list
- Bullet list
- Number list
- Toggle list
- Quote
Then there are media:
- Picture
- Video
- Audio
- Weblink
You also have advanced blocks:
- Table of content
- Block equation
- Template
- Breadcrumbs
- Synced block
Then you have databases with many views:
- Table view
- List view
- Gallery view
- Board view
- Timeline view
- Calendar view
Last, you also have some embeds:
- Google drive
- Google map
- Tweet, etc
For most of the normal usage, we only need the basics block itself.
In a nutshell, you will need a page in which you can add all these blocks.
Did you notice page is also a block?
So you can add a sub-page inside a page and a sub-page inside of that one and go on and on. Just like you can create folders inside a computer.
Now let’s touch upon something a bit more advanced.
Templates
More often than not, the pages you create might be of the same structure. So rather than replicating the same page repeatedly, you can simply create a template of that page.
With templates, you can replicate anything many times.
This saves you tons of time.
Let me remind you again that you can create a template for any block you want.
Databases
When you have all these pages, there is a lot of potential use if you can integrate all these related pages into a single database.
The best part is that Notion lets you add properties to these database entries (which is a page). So these pages can now have properties and based on these properties, you can sort, filer, perform some function on the property.
So in very simple terms, you can narrow it down to, databases is a collection of pages that can have properties.
Once you have a database, you can view the database in any format you want. That is when the list view, table view, gallery view, board view, etc. comes into the picture.
For a Practical person
I know how boring theory can be so let me show how you can use Notion with a simple example.
Do you enjoy reading?
If you do, then this is your lucky day. Because I’m going to create a book note for you.
Before we get going and open Notion, let’s think of how our book note should be.
Let’s keep it real simple.
The book note should be a list database in which you can create an entry of the book you read. In the book entry, you can give details about the book, book plot, book review, and your book rating.
The entry should contain a property of the author’s name and the reading status (whether you are currently reading it, or finished reading it, or stopped it midway)
I think that is enough for a simple book’s note.
First, sign up in Notion by clicking here or log in to Notion if you already have a Notion account by clicking here.
Once you have signed in, your Notion account will open up.
It will look something like this. (I created the pages in the left sidebar so yours will look different)
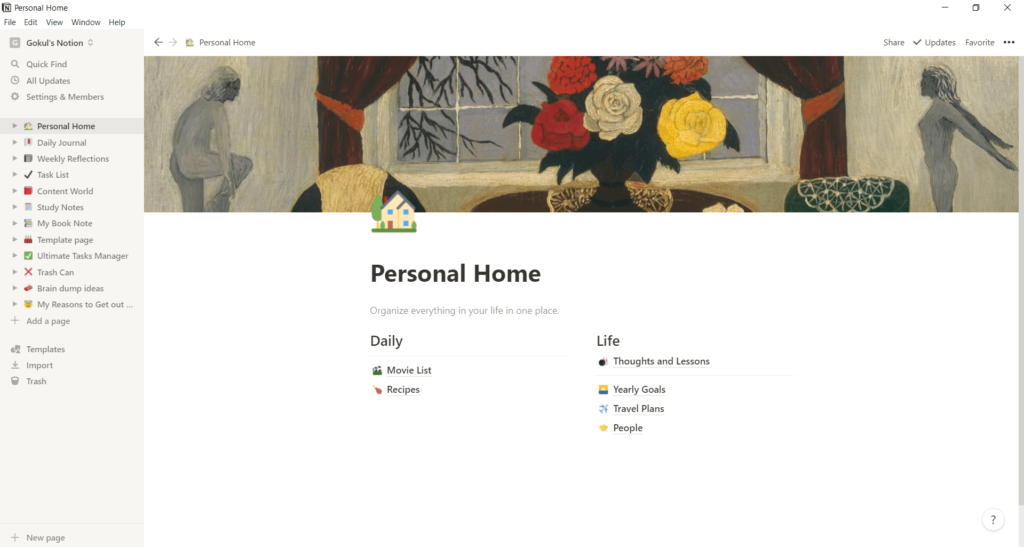
Once you reached your home page.
Creating a page on home screen
We will create a new page for creating our book notes.
For that click on the Add page on the left sidebar, which will open a new blank page for you.
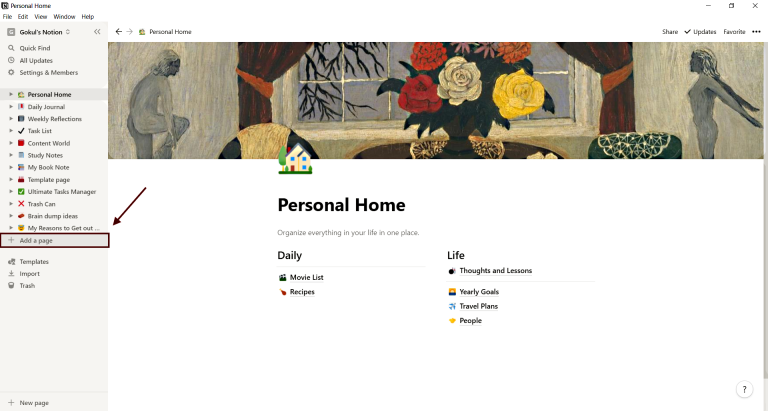
If you click on it, it will look something like the below image (New page).
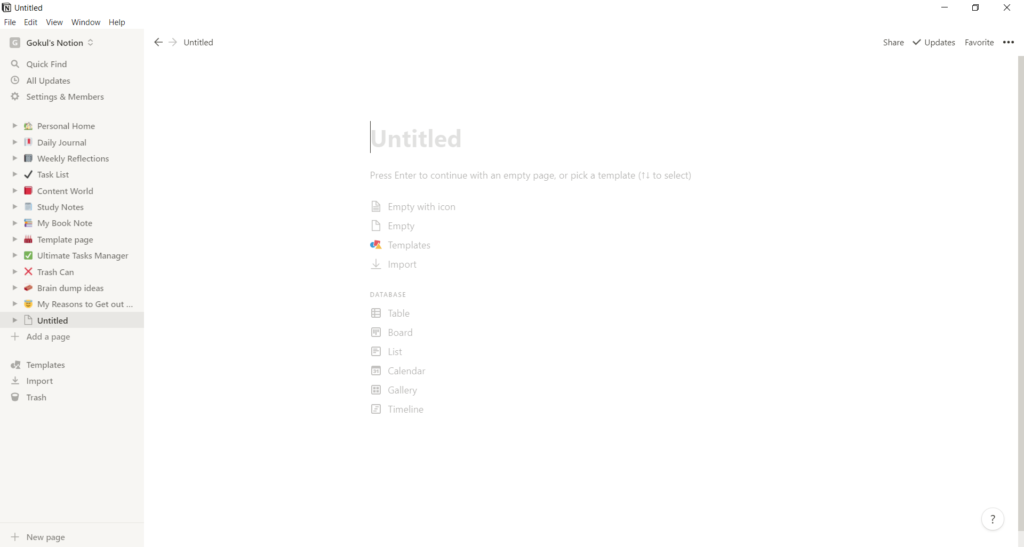
I will title that page as ‘Sample page for demo’. Feel free to change it to whatever you feel fits.
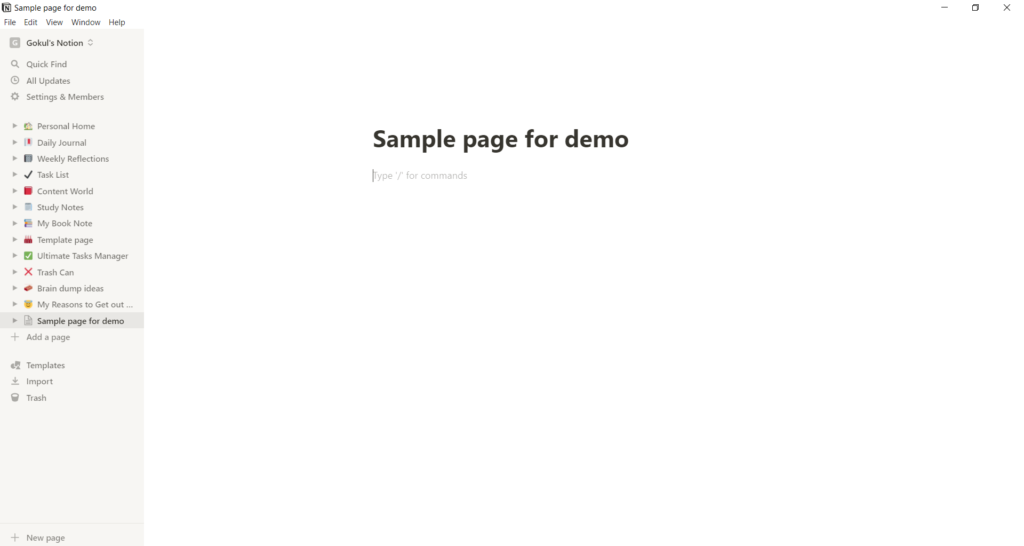
Now that we have our first page ready. Let’s add blocks to it.
We will give this page a heading. For adding a heading (that is a block), we need to know how to add a block.
Adding a block inside a page
To add a block, you have two options.
- Mouse
- Keyboard
Using Mouse
Do you see the tiny ‘+’ sign at the start of a line?
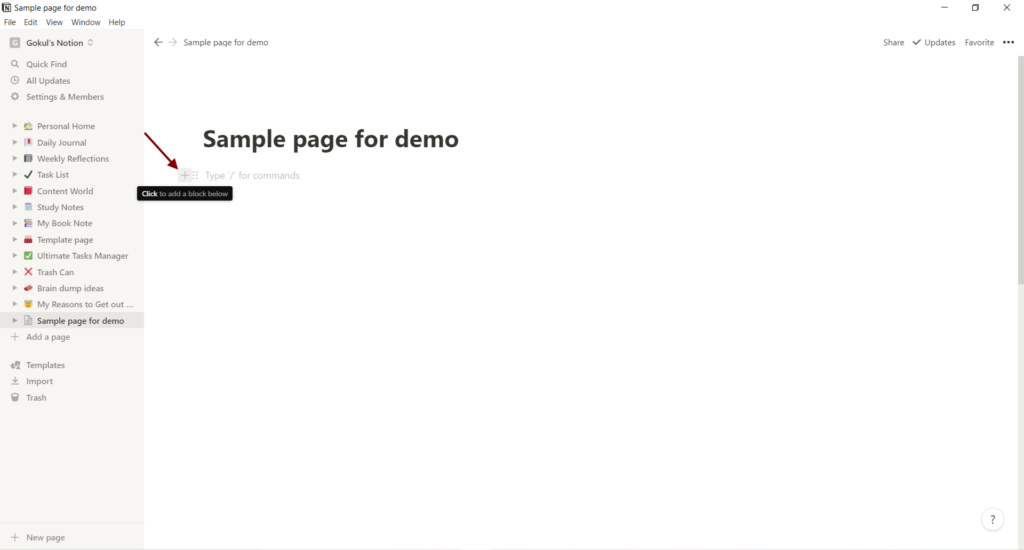
Click on it.
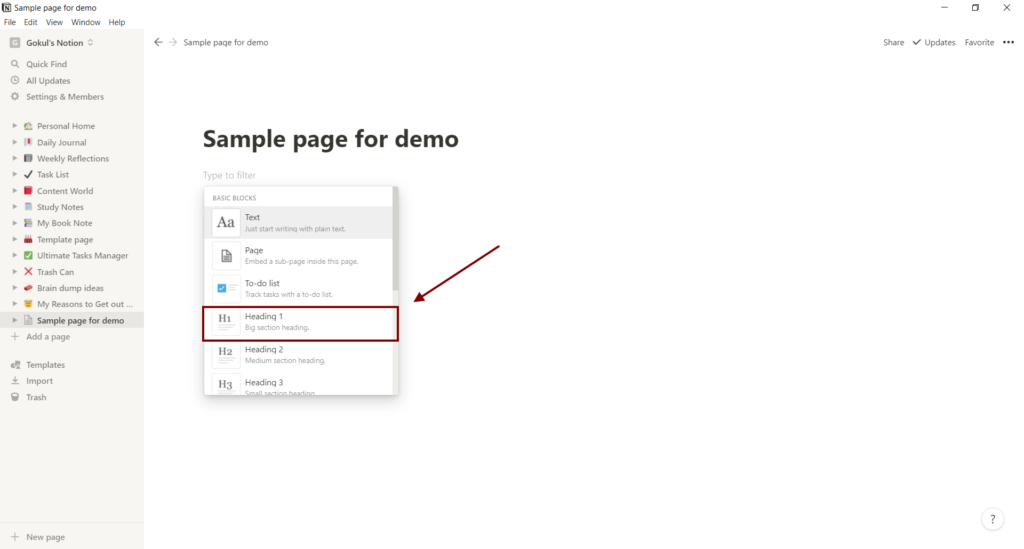
It will open a list of all the blocks available. You can choose from it.
For now, we will choose a ‘Heading 1’ which is the biggest heading.
Once you click on ‘Heading 1’, a Heading 1 block will be there as you can see in the image below.
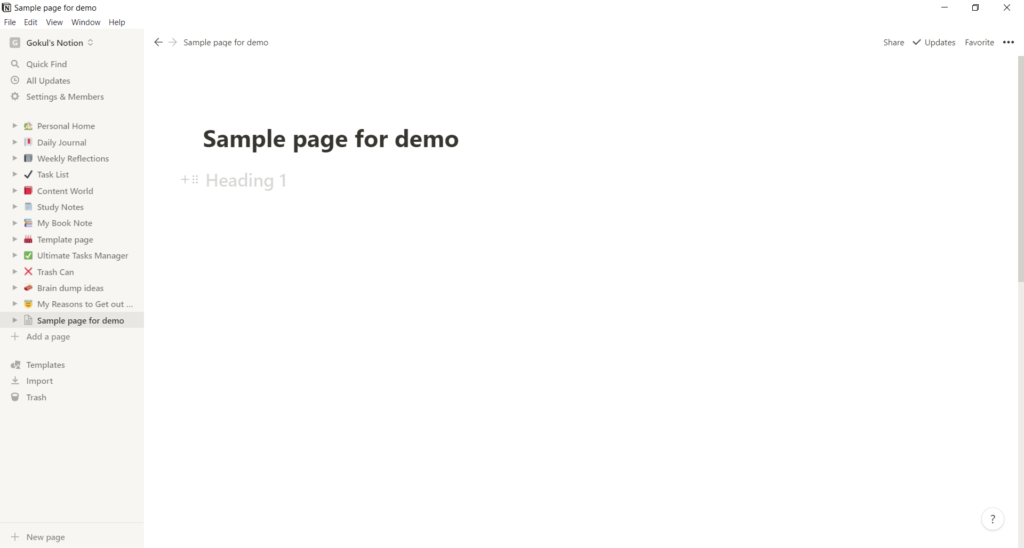
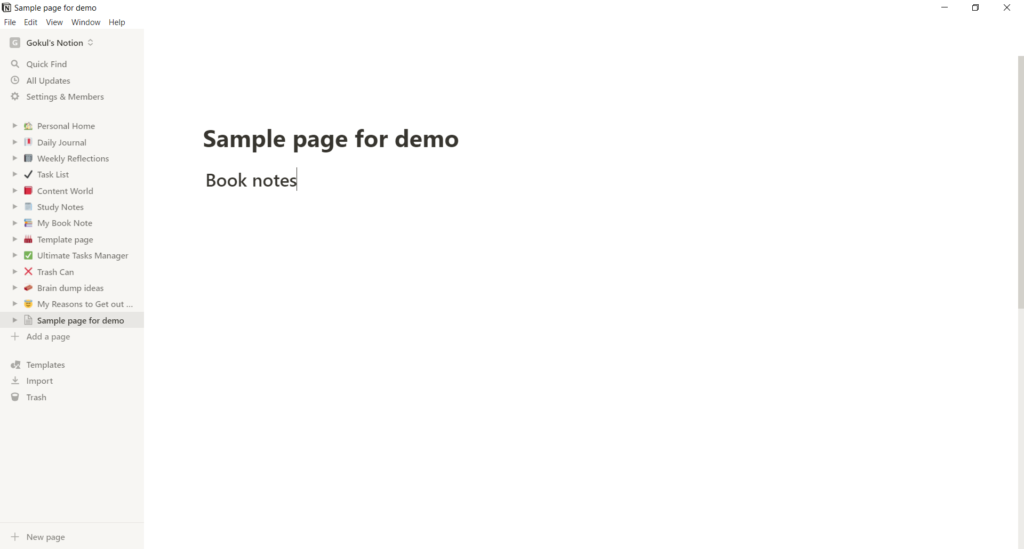
You can type your desired heading name there.
Voilà!
You now have a heading.
Note: Right next to the + sign, do you see a box with 6 dots? I don’t know what it is called, but I know you can move your block anywhere by dragging it or open the menu by clicking it.
Using Keyboard
Using a keyboard is much simpler than using a mouse.
Just type ‘/h1’ and hit enter.
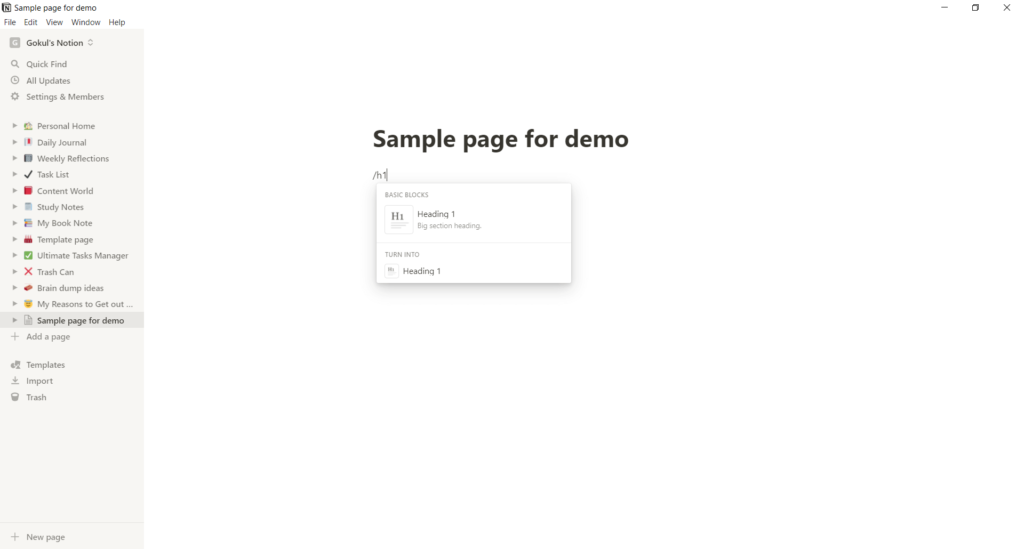
Done.
You can now type your heading name.
Similarly, you can type ‘/’ and type whatever keyword you want, maybe a heading or bullet list or page. This will create that block.
So for creating a page just type ‘/page’ and hit enter.
I hope that is clear now.
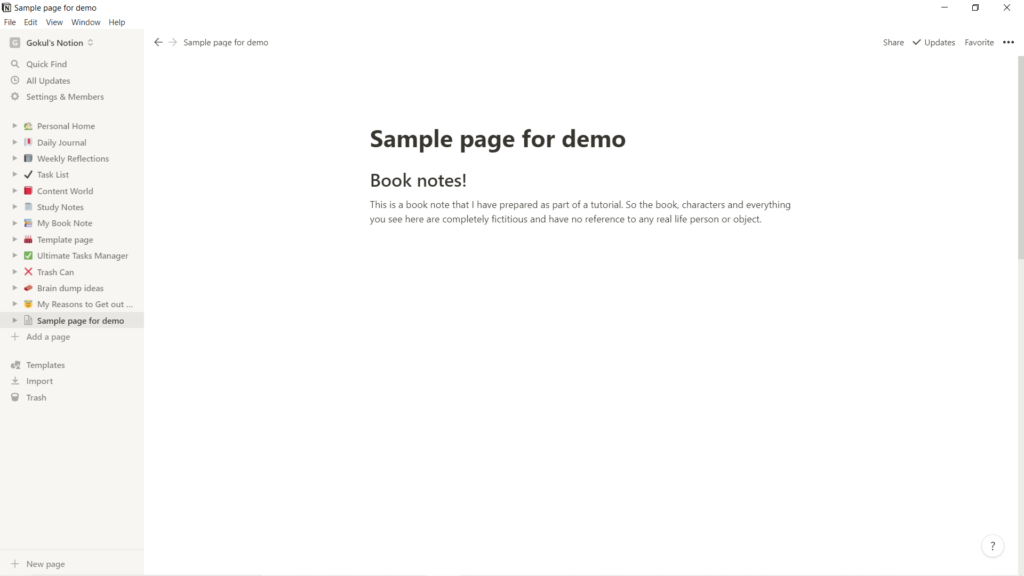
After adding a heading, I will just add a few lines of briefing about the book notes below the heading just to make it clear. This is completely optional to you.
To add a text you don’t to do anything additional. Just type whatever you want.
Optional
Though we started out to make a book note. Let me show you how to use a template because that is very useful and we need to use a template at a later point in the tutorial.
So here is a quickie on how to use a template
I will use keyboard shortcuts as they are more comfortable for me.
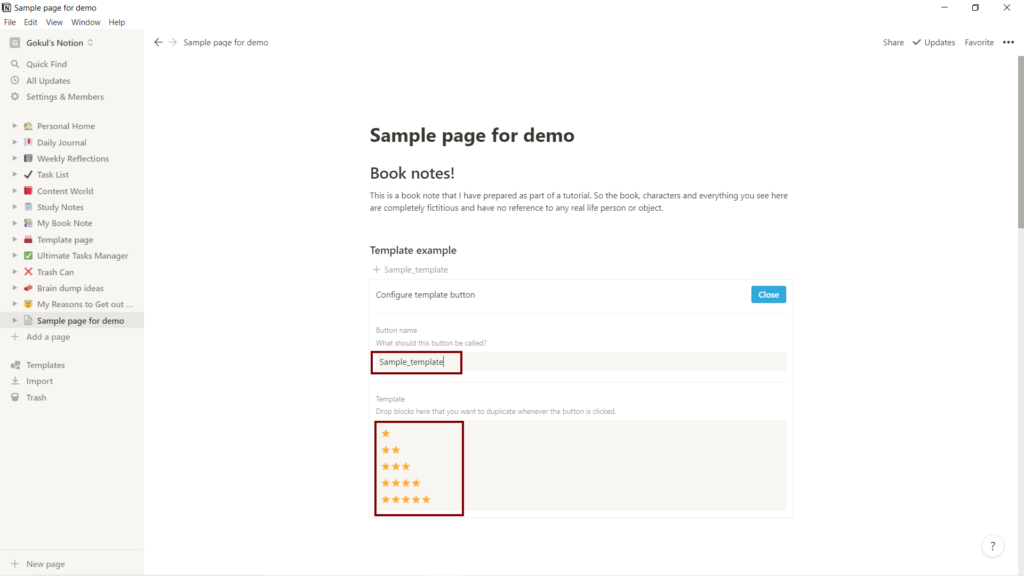
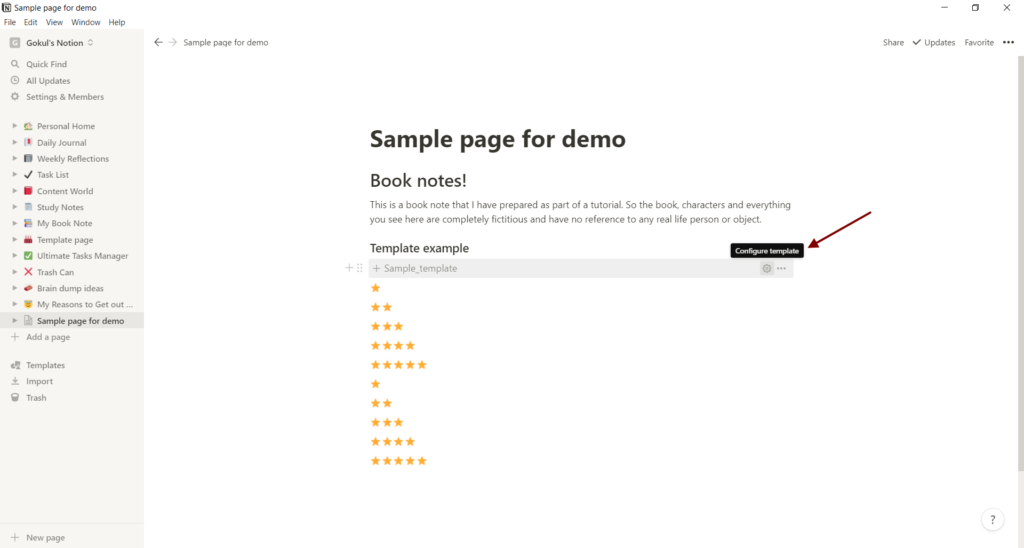
First type ‘/template’ to get the Template button block.
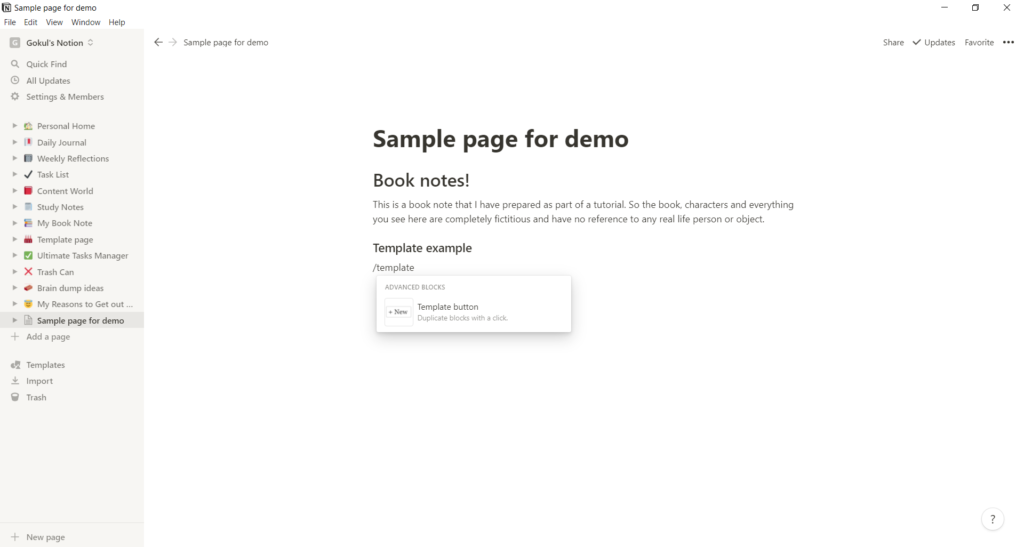
On clicking enter, a configuration box will appear like in the reference image.
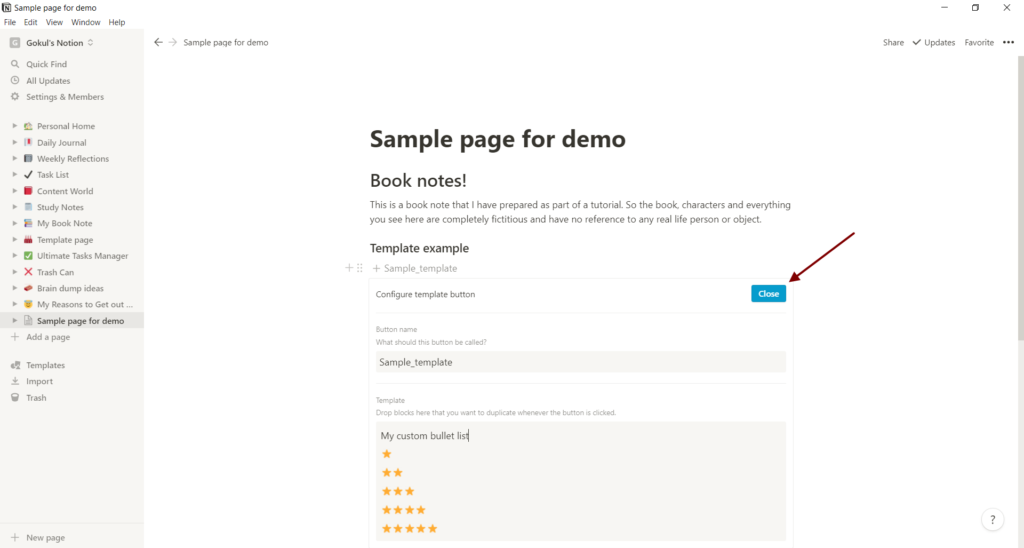
You can configure two things.
- What do you want to call the template button?
- What do you want to duplicate?
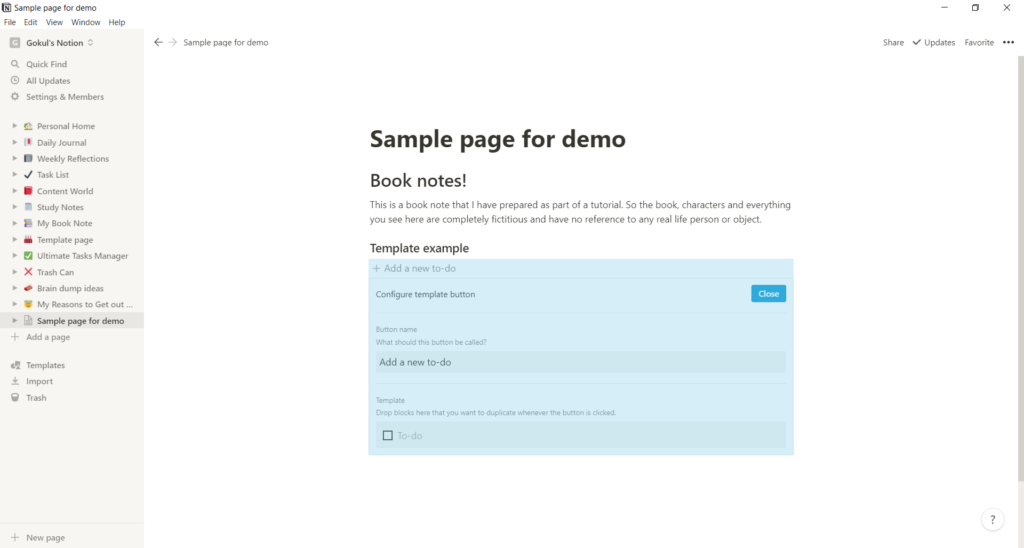
I have given the name as ‘sample template’ and created a custom bullet list block as a template.
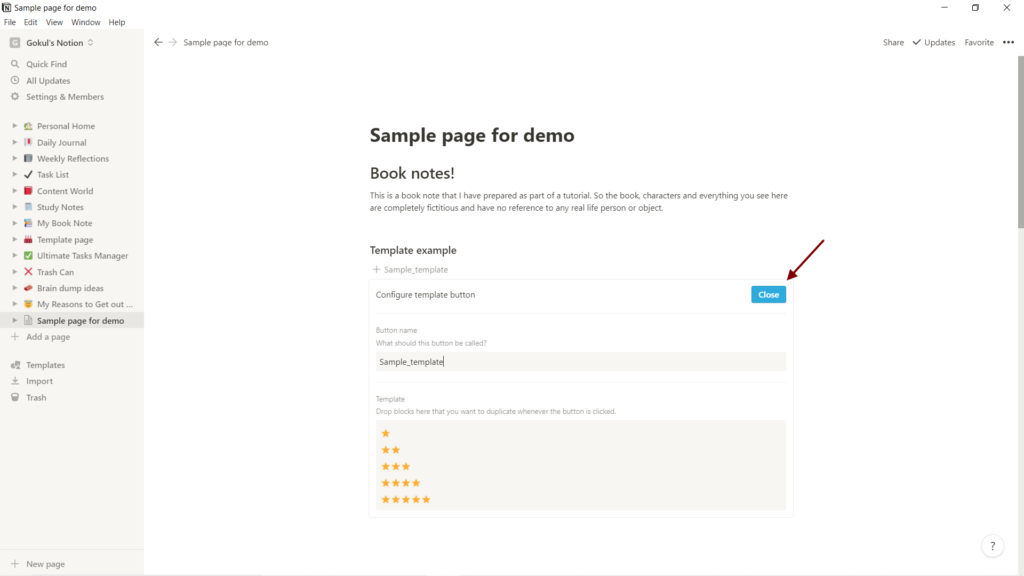
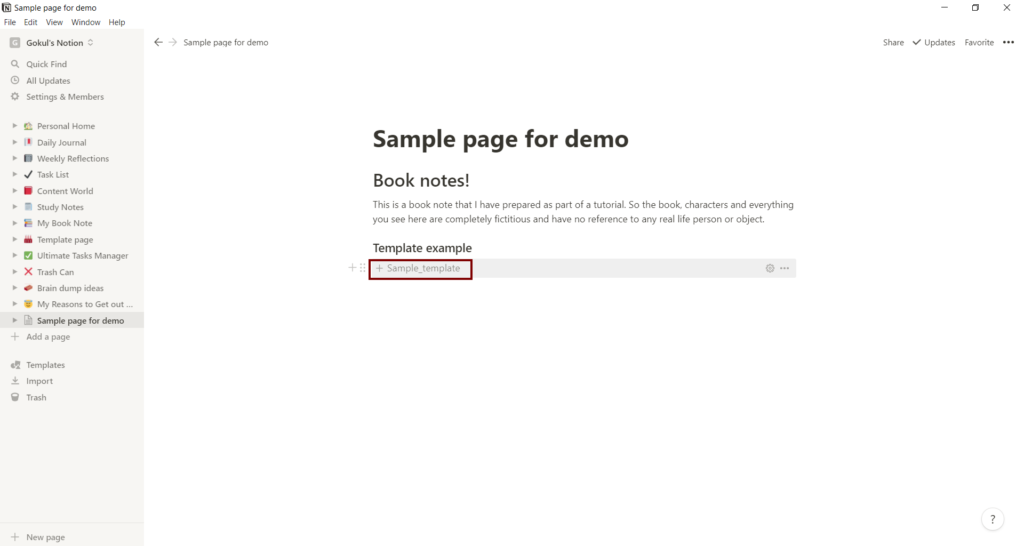
After you are done. Click close to close the configuration box and now you will see your template button.
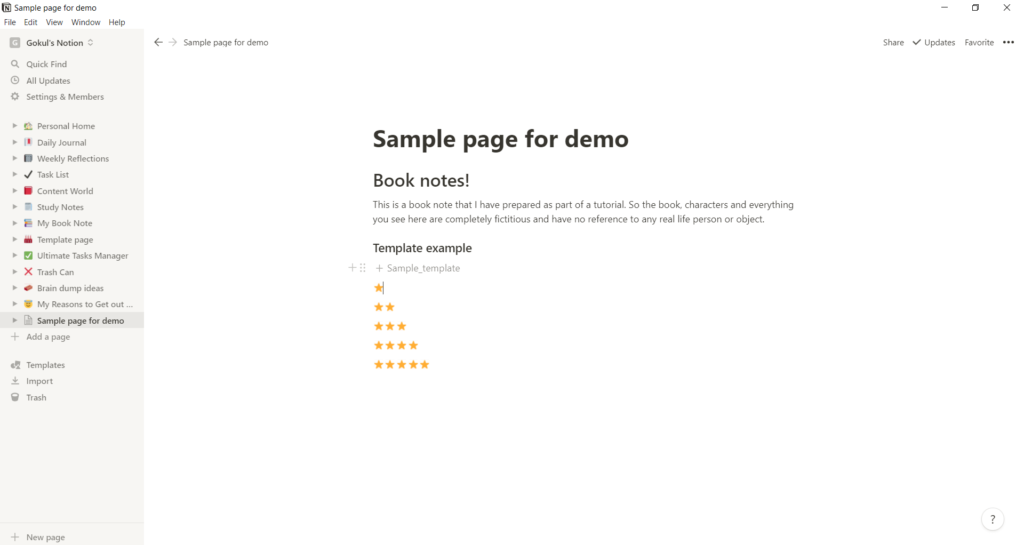
Click on the template button to create a duplicate.
I clicked on mine and it generated that bullet list that I have given previously.
Suppose now you have a change of heart when you saw it and want to change it. All you need to do is click on the Configure template (gear symbol) and the configuration box will re-appear and you can make the edits you want.
I just added a new line (My custom bullet list) into the template block.
I hope the templates are clear to you.
Let’s get back to our book notes.
Creating a database
For continuing our book notes, we first need to create a database. Don’t worry, I will show you.
Click on the + sign to get the block list and in that list, under database pick list inline.
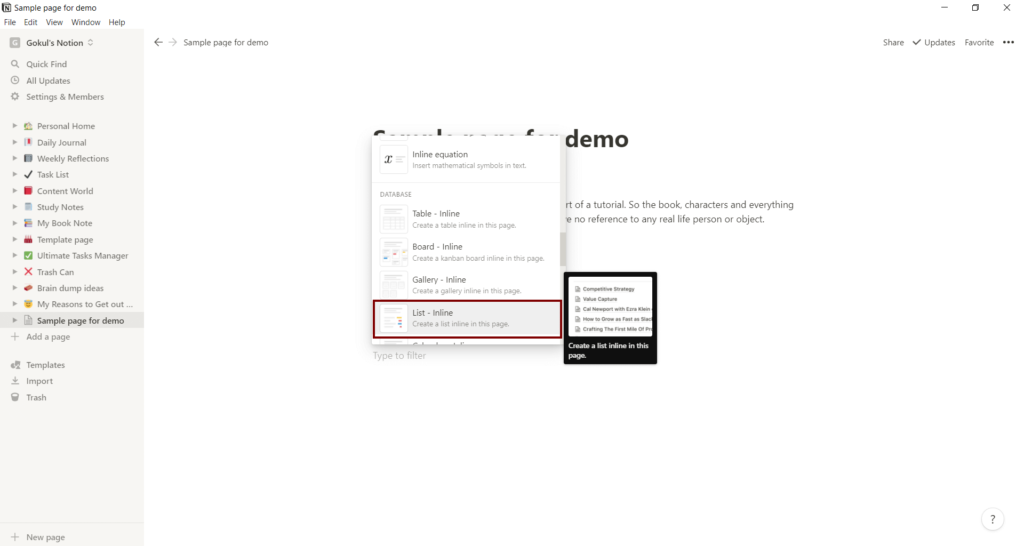
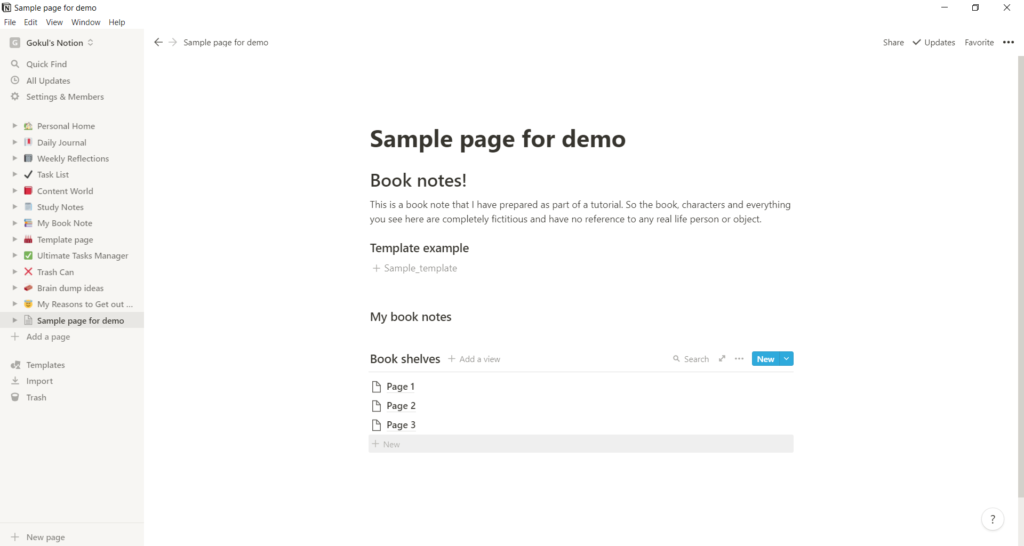
This will open up an inline database as you can see in the image.
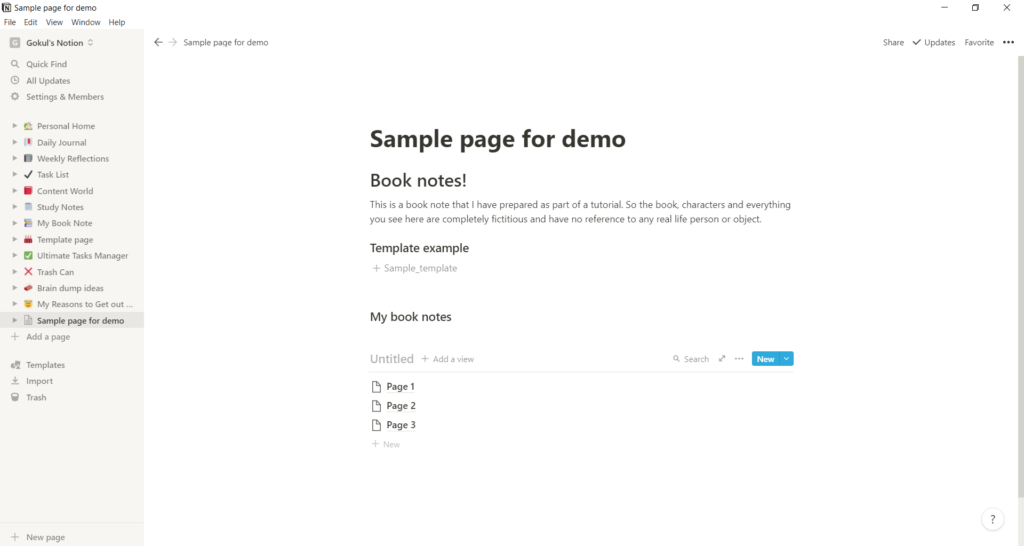
This is how an inline database will look like. I know there is a lot to take in for a first-timer.
You can see an Untitled written as we haven’t named our database. Then on the right of that, you can see Add a view which is useful if you want to change the view of your database. I will show an example towards the end of this guide.
Then right of that is a search bar that helps you search your database. Then a ‘…’ for more options. Last, you have the rightmost option as New which helps you add an entry into your database.
This option also helps you create and edit templates if you want to create a template.
Let me name the database as Bookshelves just for fun.
Now that we have our database ready, we can add entries to our database.
Adding an entry in our database
There are two options to create an entry in the database
- Click on the ‘+ New’ you see at the bottom of the database
- Click on the ‘New’ button in blue color on the rightmost side
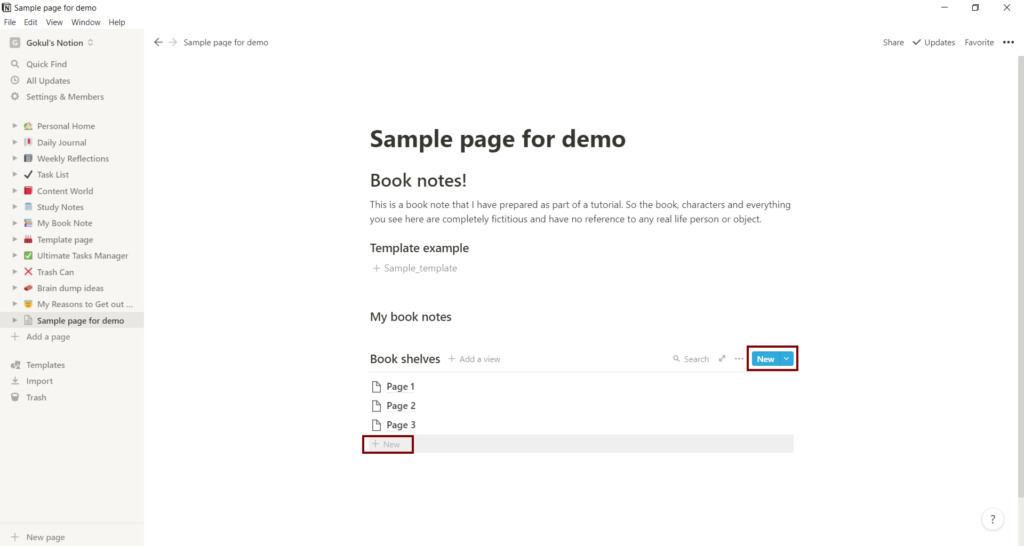
But since we already have 3 entries already given to us by default. I will use that one rather than creating a new one.
I will click on Page 1 which you can see inside the database.
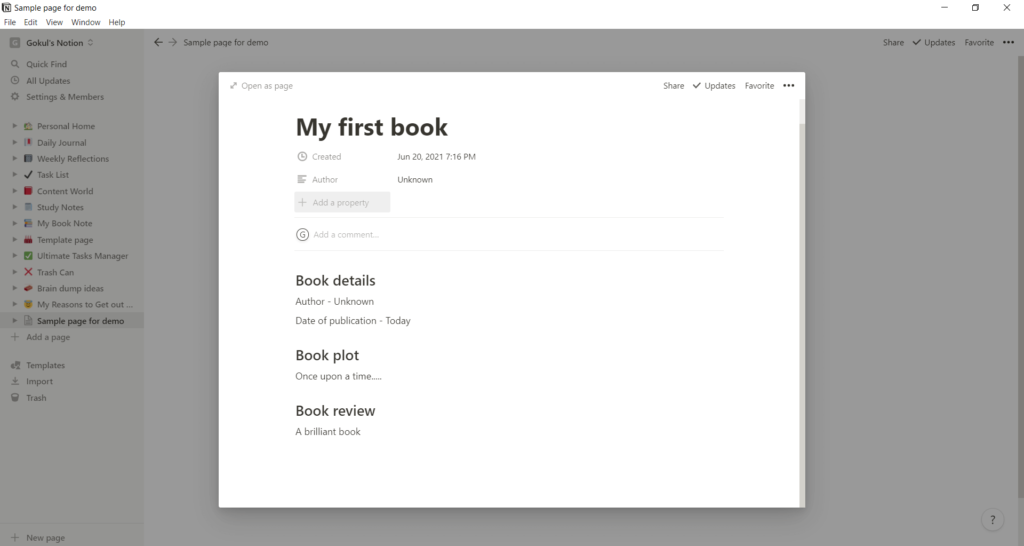
This will pop open Page 1 for you like the one you can see on the reference image (Page 1 opened).
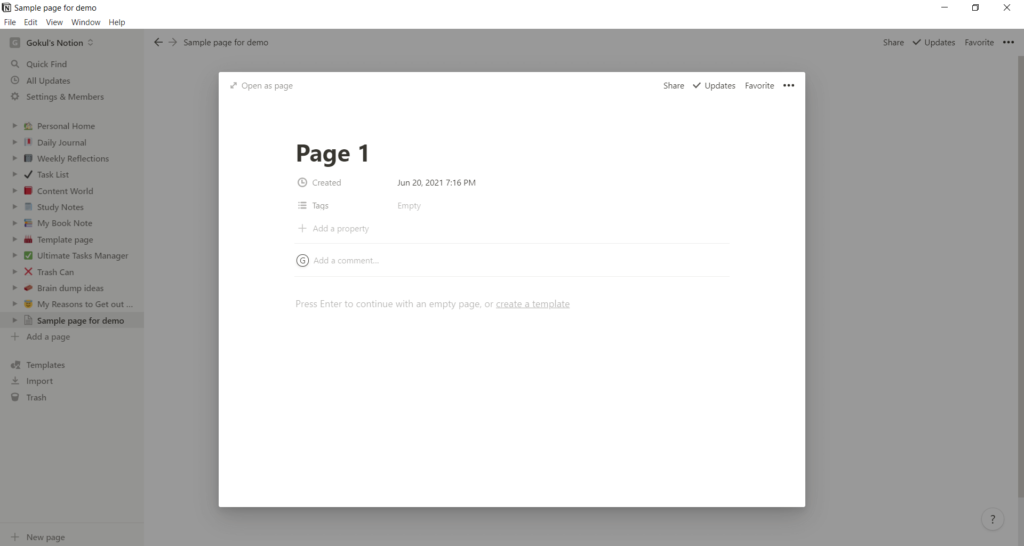
I will change Page 1 to ‘My first book’.
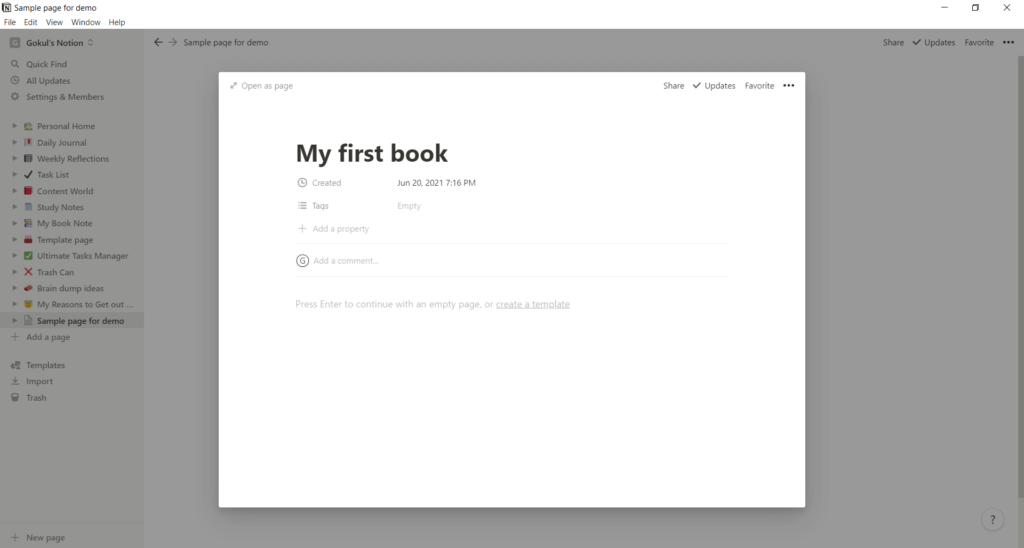
Now I will add three headings. One for book details which contain the basic details of the book. Then the next heading will be ‘Book plot’, which will explain what is the plot of the book considering this is a fictional novel. Then a heading called Book review which the review of the book.
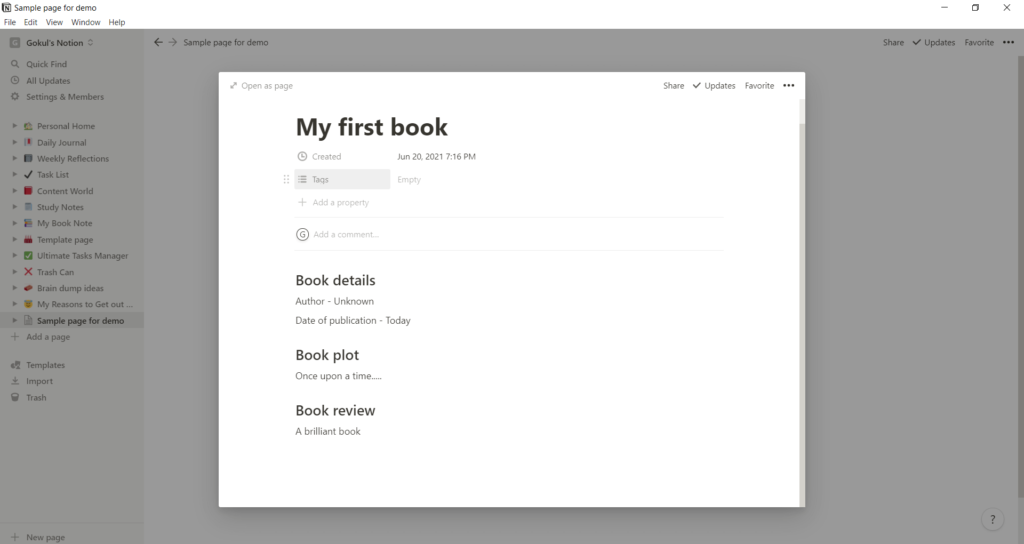
Let’s keep it there as the content of the page.
Now, let’s add some property to our My first book.
Creating properties on a page
I will add two properties here
- Name of the author
- Start date of reading this book
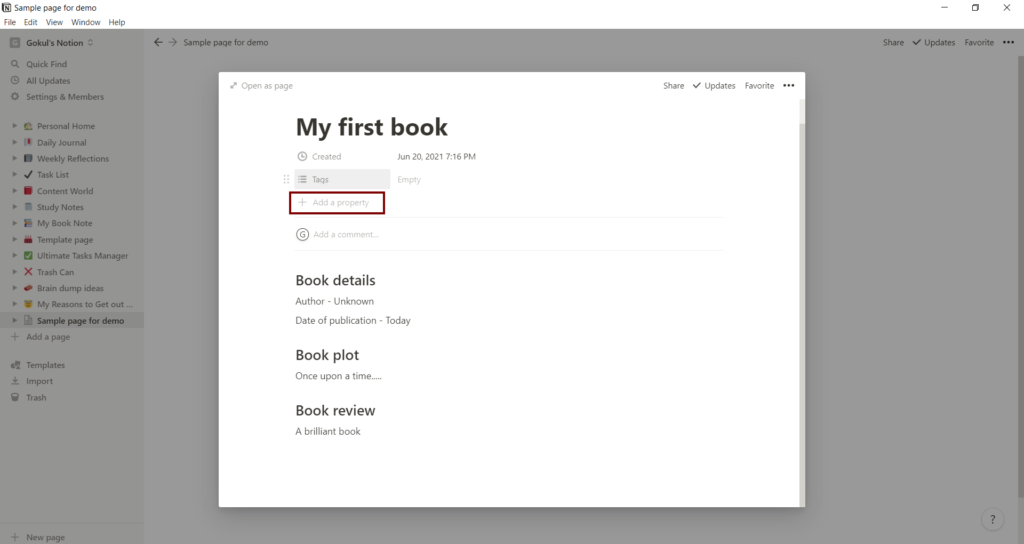
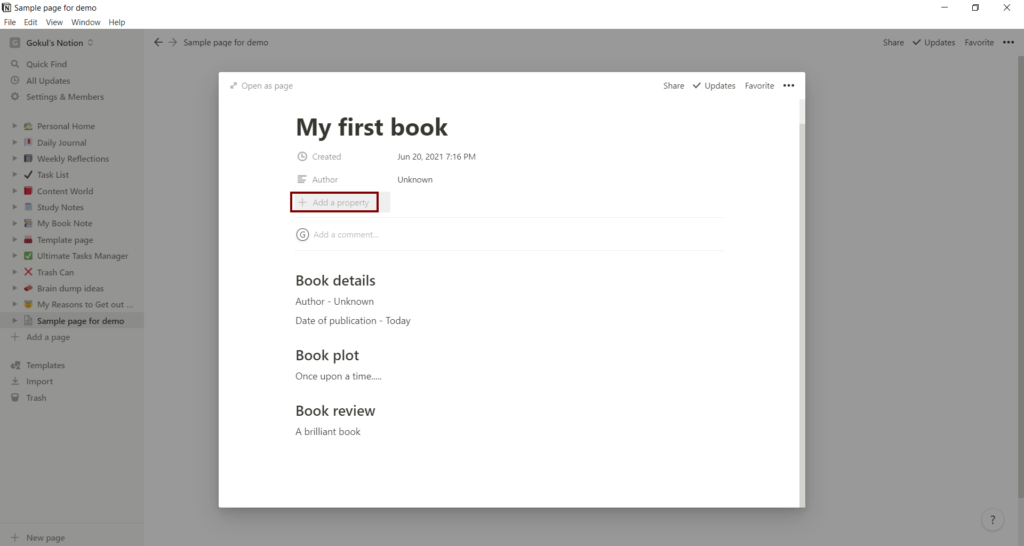
To a property click on the ‘+ Add a property’ button you can see.
Create ‘Author’ property for a page
Currently, we already have two properties.
- Create (created date)
- Tags
I will keep the Create but don’t want the Tags property. I will reuse that for Author property
To edit the property name, simply click on the Tags. I will rename Tags to Author.
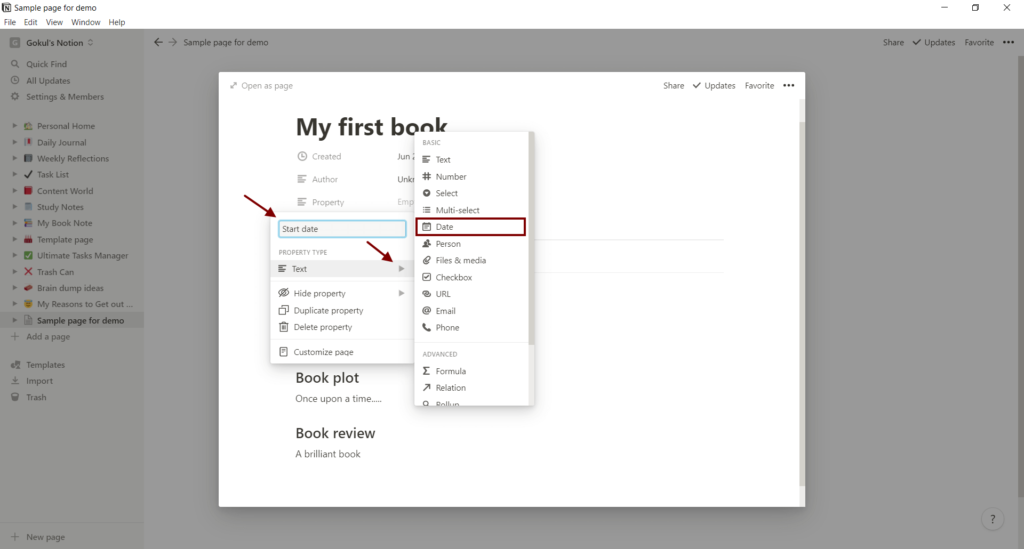
Now you want the property type to be a text as you want to type the name of the author as you create new entries. For that, under PROPERTY TYPE, click on the side arrow to see all the properties and select text as the property type.
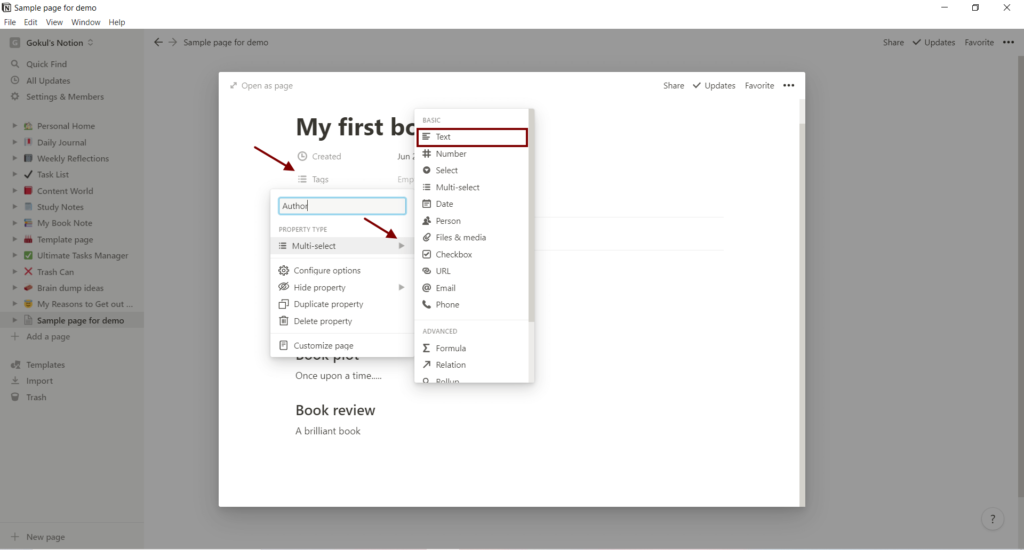
Now you can see that you have a property called Author.
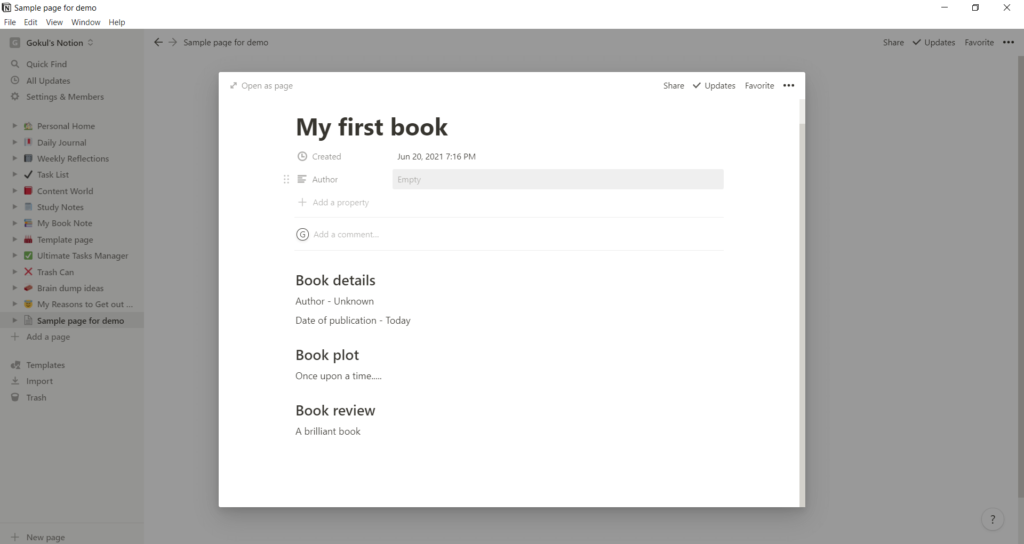
Let me give the Author’s name as unknown for our fictitious book.
Now I want to add another property called Start date.
Create ‘Start date’ property for a page
For that, click on the ‘add property’ you can see below Author which will open a configuration box.
Let me give the property name as Start date and property type as Date.
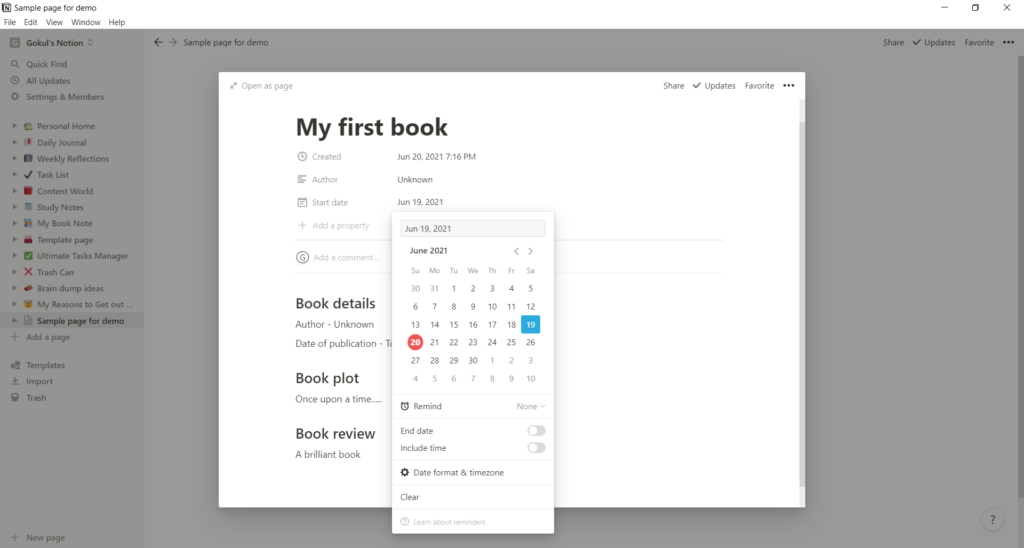
Now that we have added the new property, let me pick a Start date from the calendar.
Now to go back either click outside the page or click the backward arrow at the top left corner.
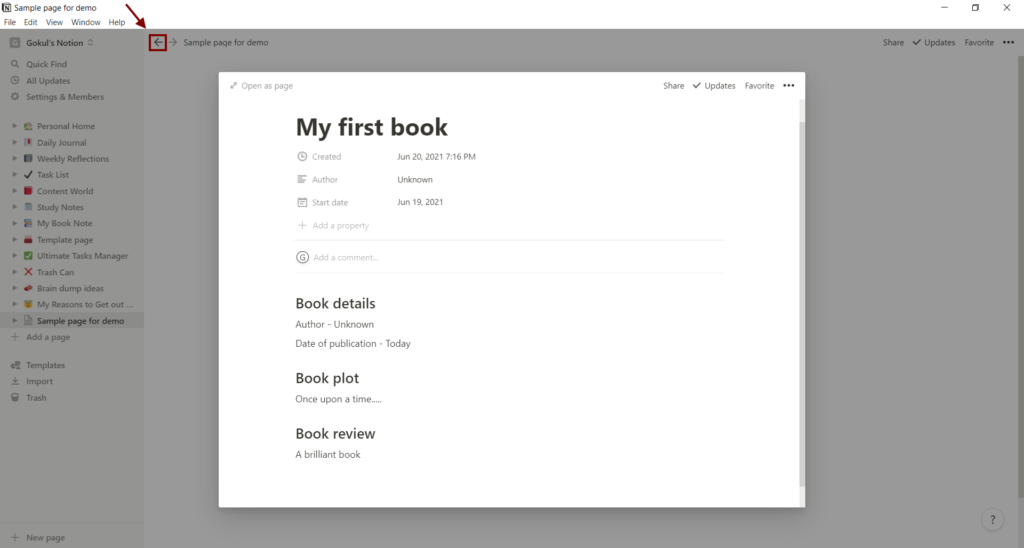
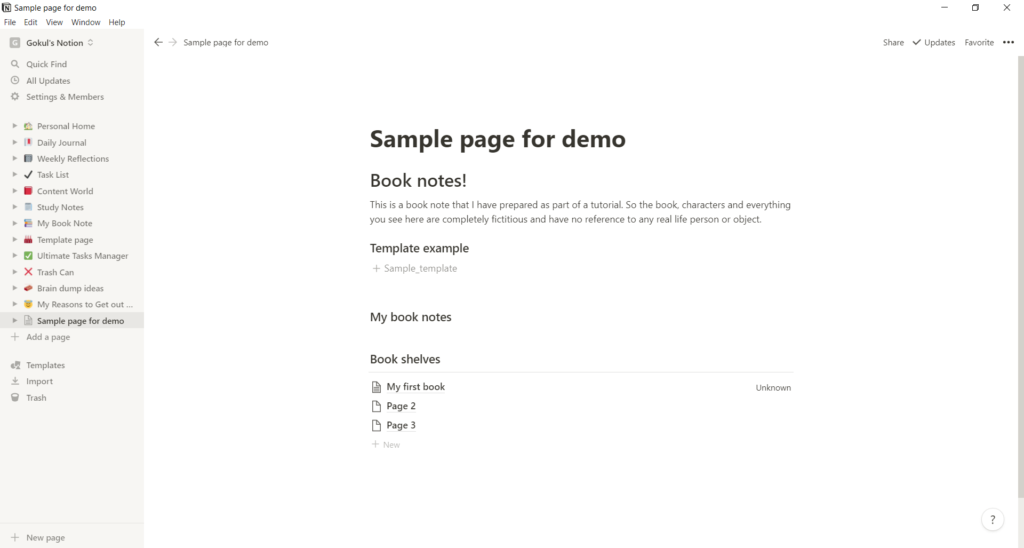
Now you can see our database base named Bookshelves in which you can see the book-entry we just created under the name My first book. You can also see the author’s name on the right side as we were renaming the existing property.
You might think that wasn’t easy. We had to do a lot of work just to add one entry.
Think about how much effort will it take to make all the entries alone?
That is why I introduced the template earlier. With the template, we are to reduce 90% of the above work with one click.
Create a template for the database
Let me show you how to create a template page for our database.
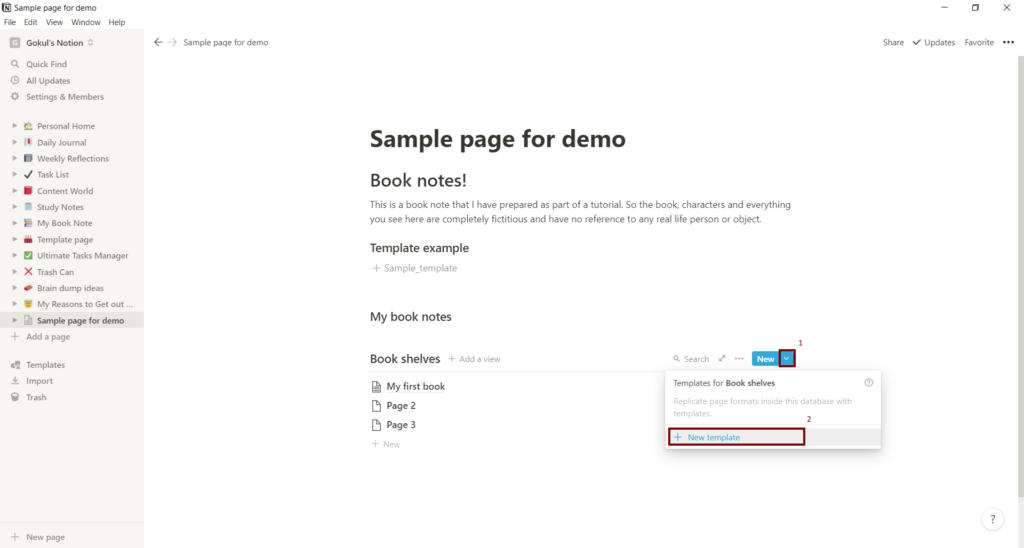
Press the down arrow right to New and you can see the box appearing that says ‘Template for Bookshelves’. Now let’s create a template by pressing the ‘+ New template’ and a template page will pop open.
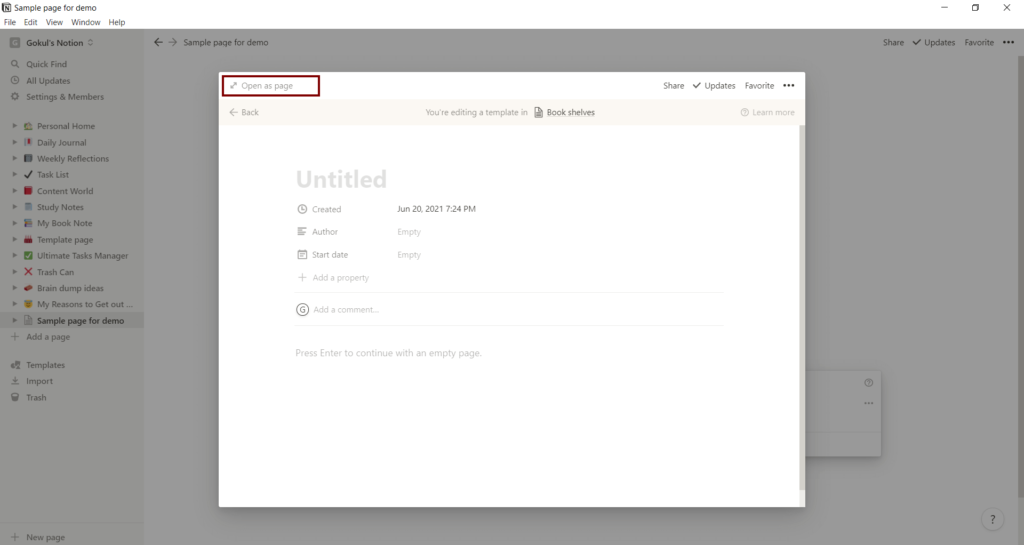
This will open a template page for you where you can design how your template will be.
Note: If you want to maximize the page size. Click on the ‘Open as page’ and you can view the page on full screen.
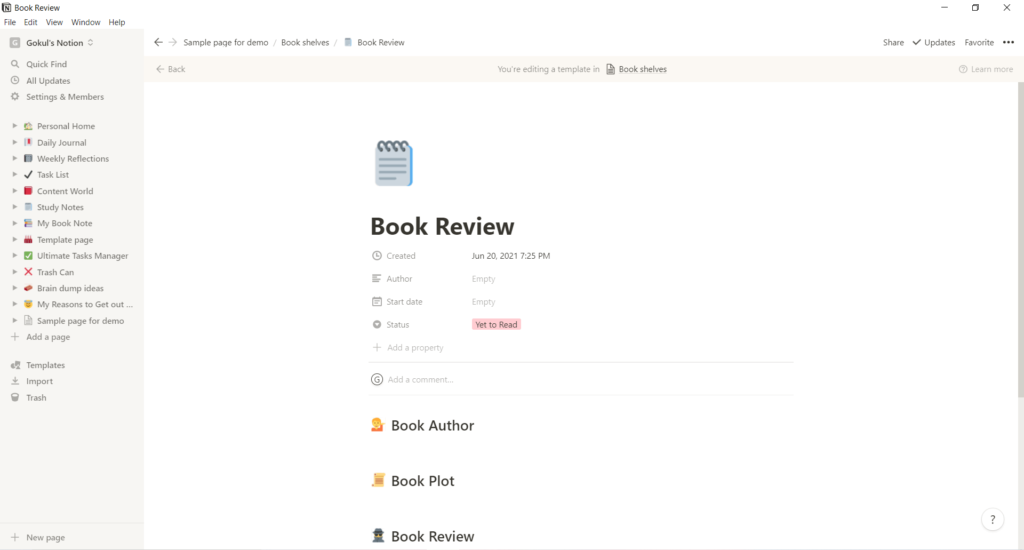
I have opened the template page on full screen now and replicated the earlier format we created for ‘My first book’ into this template.
‘Book review’ is the name of our template now. I have added 2 properties and the headings we discussed earlier. I added another property called Status to store what is the current reading status of this book. Also added some emojis for fun. Did I forget to tell you Emoji is also a block? Then you should know how to add an emoji too.
Now click on the Back button to go back.
Selecting a template for database
Now if you press the down arrow next to New, you can see they give you two options.
- Book review – which we have just created ready for duplication
- Empty page – If you want to start from scratch
Click on the Book review if you want to duplicate our template page.
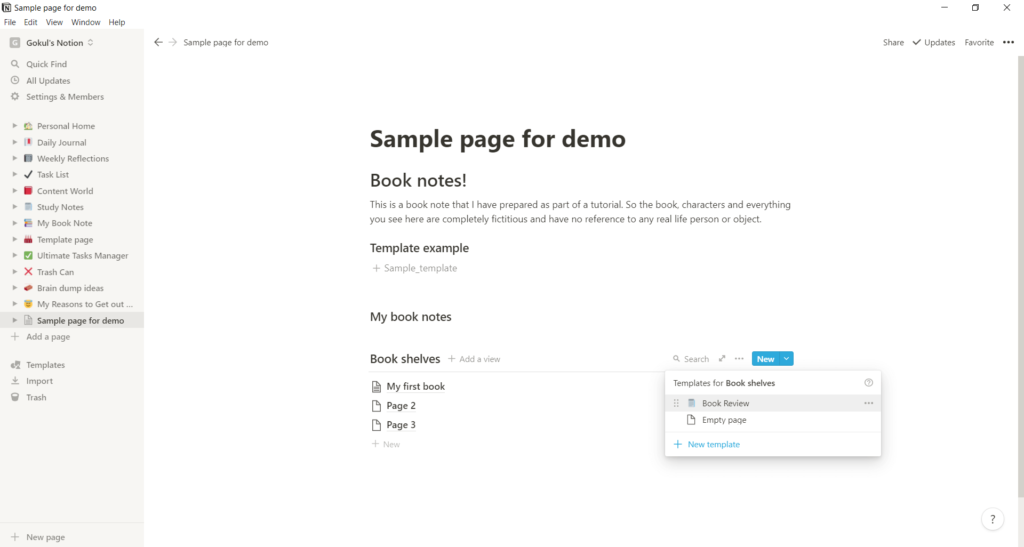
Also, there is another option.
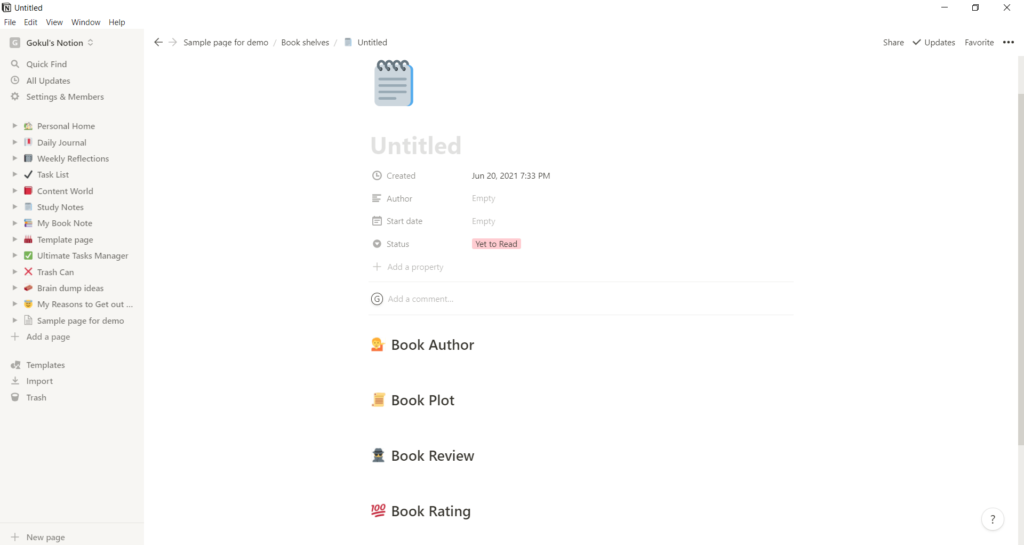
If you press the ‘+ New’ button at the bottom of the database to add a new entry, you see that an empty page has opened up. But there is a provision to select a template. You can see the template list we saw earlier. If you click on the Book review, it will change the page into our template format, if you click on ‘Empty page’ it will create an empty page.

So now you know how to create a new entry into our database with just one click.
Just fill in all the details for our second book.
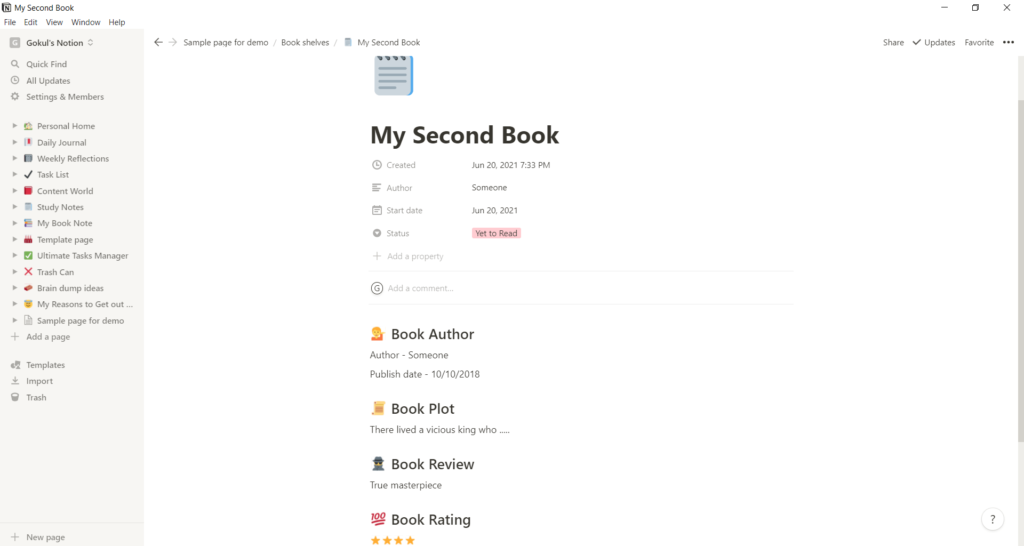
Click back and go to our parent page.
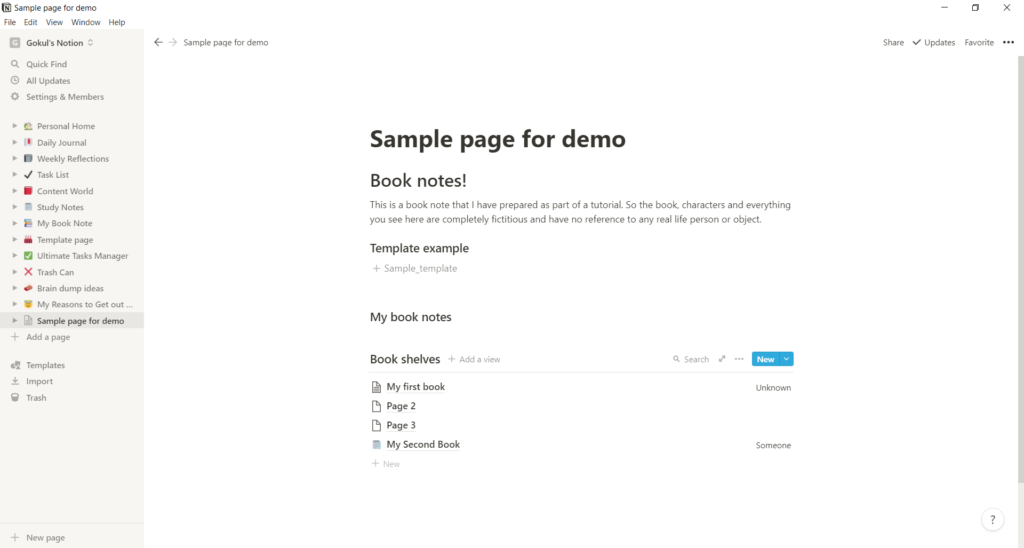
Lastly, let’s change the view of our database.
Changing view of a database
I know at least one of you isn’t a fan of the list view. We can change the way we view the database by following the below procedure.
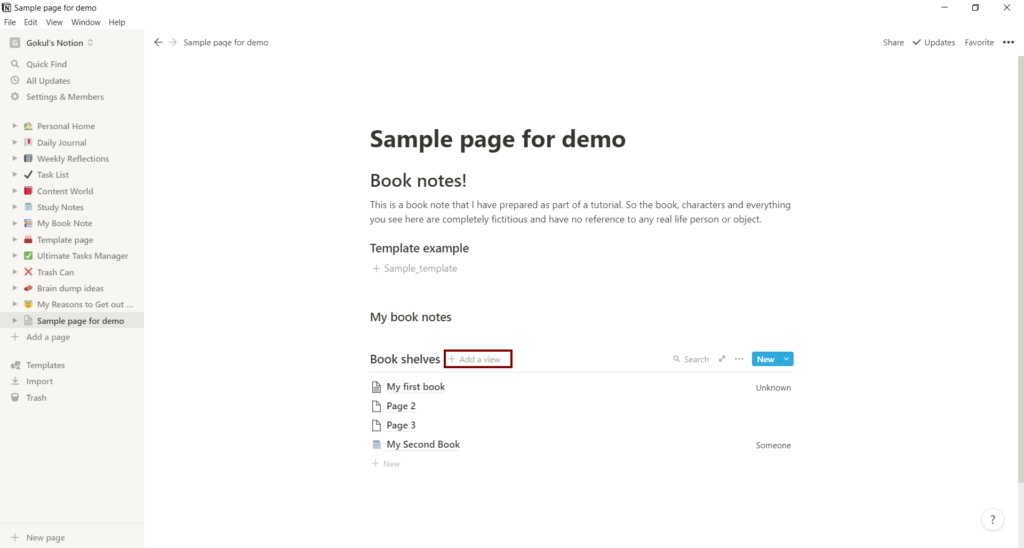
Click on ‘+ Add a view’ right next to our database name.
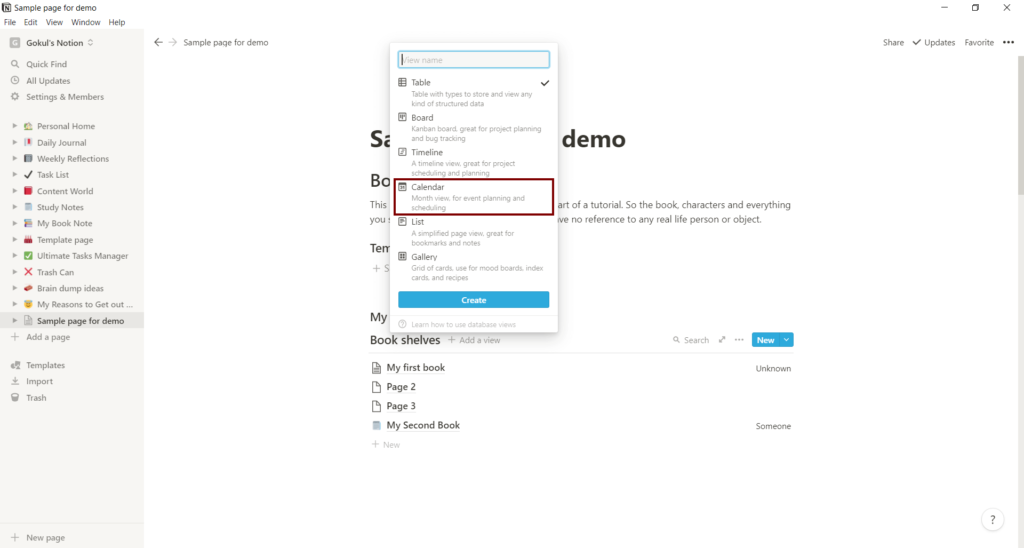
A box will appear with the list of all the views will appear. By default, Table is selected, but you can choose Board, Timeline, Calendar, or Gallery. For now, I will pick Calendar view which lets me see the book notes on a calendar based on the start date.
With the calendar view, our database will look something like this. This is just to show that you can customize your database in a variety of ways.
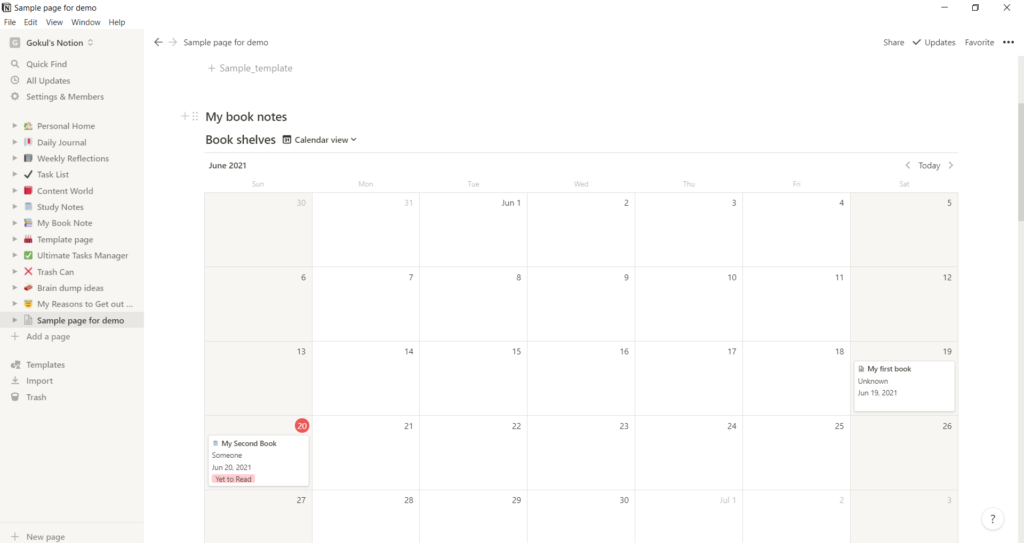
I think we have successfully created our book note and therefore completed our guide on how to use Notion.
Wrap-up
I know this has been a long guide and there is so much to absorb. Let me remind you to take it slowly. I took quite some time to figure Notion out so don’t be hard on yourself if you didn’t get it the first time.
With this blog post, we tried to have some idea about what Notion is and what you can do with it, and most importantly how to use Notion.
We saw a sample demonstration of how anyone can use Notion to create a simple book note.
I hope this blog post was helpful to you.